You can get started with 2D animation even if you are entirely new to it. This article will provide you with step-by-step instructions to help you create your first 2D animation video. Now we will go through the 2D animation workflow and how it works.
However, it is worth noting that each animated film was created uniquely, using various techniques and devices. There is no one-size-fits-all approach to animation, and the processes outlined below are not usually performed in the same order.
Let’s get into the meat of this guide, which will disclose the procedures you’ll need to do to create 2D animation films.
Step 1: Video Script and Color Scripts
Your video will have no impact without a mind-blowing video script, regardless of how good the quality is. A video script serves as the building block of your video. You can do it yourself or hire a professional scriptwriter to do it for you. What appears on screen is determined by your script.
Any video’s starting point.
All you must do is keep an eye on what’s going on in your immediate environment. A movie, a song, or a poem can all be sources of inspiration. You can draw inspiration from anything in your life, and All of the animation’s dialogues are written during this phase. It is crucial to consider the animation’s intended audience when scripting. It is essential to note.
Each character in the animation has its color palette and the colors of various objects, important locales, and backgrounds. The art department also selects the many colors used in the animation’s lighting. During the film’s production, the script changes a lot, and we do not get the final version until the end.
Step 2: Create a Storyboard
There are many different sorts of storyboards. Layout Storyboard, Animation Storyboard, Flowchart Storyboard, Interaction Storyboards, and Visual Interaction Storyboard are several types of storyboards. The purpose of a storyboard is to organize a tale.
Consider a storyboard to be a comic strip. The storyboard will determine whether or not the script will work. A storyboard will also assist you in making the best use of your resources, identifying flaws, and deciding on punchlines for effective 2d animations.
To examine the story’s flow, divide it into pieces and keep them in a logical order. A storyboard does not necessitate any special abilities. Several pieces of 2D animation software can assist you in creating a variety of characters and storyboards without requiring advanced technical knowledge for effective 2d animations.
You should select the most appropriate piece of software from among those accessible on the market for your project.
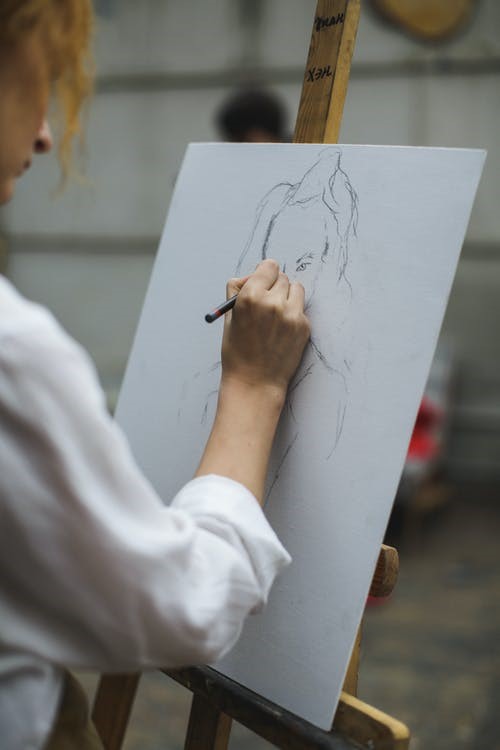
Step 3: Designing
We begin designing the characters and backdrops for the animation after all of the scheduling is completed, divided into two sub-categories. Everyone gives suggestions when it comes to character design. Every animator grabs a pencil and a piece of paper and begins drawing various character designs over and over.
Finally, they develop a character design that everyone on the team likes. Character design studios that can offer rapid and reliable assets for their projects are frequently used by artists to outsource this step. Even if it is only the main character’s bedroom, a school class, or an entire hamlet, animators must arrange everything.
They use images acquired during the research process to create backgrounds on occasion. They also use their imagination at times. Each aspect of the animation, including actors, objects, backgrounds, and any extra visual effects, is represented by a model sheet. Each model sheet consists primarily of the final design and drawings of the primary diverse stances that a character is likely to perform during the animation.
To maintain a similar appearance and feel for each character, these sheets serve as a standard reference throughout the animation process. So, they’re instrumental, like in large groups. When multiple animators may be working on the same character at different phases of the process, the character will appear to be dawned by one animator if the steps are done correctly. An off-model is a character that is not rendered according to its conventional sheet model.
Step 4: Theme songs
Composing the songs that the characters will sing is the next step in effective 2d animation. This stage is only relevant when discussing a musical picture; not every animated film features singing. Musicians often include simple and catchy tunes in their compositions so that listeners remember the lyrics and they become stuck in their heads. Please take a look at some of the best Pixar films, such as COCO and many others, in which every character sings a song, or there is a theme in them.
Step 5: Voice or Dialogue recording
The voice performers read lines from the script while recording different sound effects during dialogue. The animators are then given drawing appropriate mouth motions to match each spoken syllable. To create effective 2d animations, good voice acting is essential. After the concept art is completed, it is time to record the characters’ voices. Casting, character presentation, and recording are the three processes in this procedure.
The dialogue tracks were once converted to an optical or magnetic sound tape with holes that exactly matched the motion picture film. Both the image and the sound were mechanically locked together, allowing them to be exported for alteration on sound mixing equipment.
Each portion of a word is identified by moving the sound film back and forth over a magnetic pick-up head by hand. ‘Track reading’ is the term for this procedure.
As a reference for the animator, the conversation track is evaluated, and the information is charted up onto camera exposure sheets, sometimes known as ‘dope sheets’ or ‘camera charts.’ By allowing the editor to scrub back and forth through the audio file with a graphic representation of a sound wave, modern computer software has made it easier to analyze dialogue precisely.
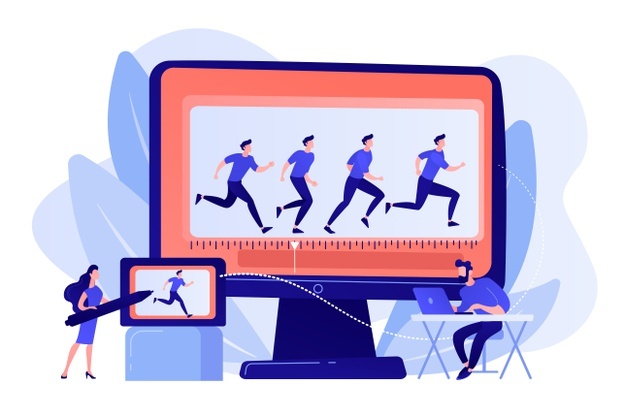
Step 6: Animating
This is the point at which 2d animation becomes fully animated. Now that all the storyboards and preparation have been completed, it is time to let the animators work their magic. The key animators (or primary animators) and the inbetweeners are the two types of animators. Every character has a main animator assigned to them, usually the one who designed them, who will draw all of the scenes in which the character appears.
Key animators draw the frames featuring the characters’ basic stances without regard for the fluidity of the movement. The inbetweeners are the animators who take the mainframes made by the primary animator and add more frames to make the movement flow and look realistic. A second must have an average of 24 frames every second.
Tweening is the term for the process of populating the mainframes. They must remember that the characters must do essential human functions such as breathing and blinking. They need to make them feel like they have flesh and bones. Tweening is also a challenging process because everything must be consistent and coordinated. They put all of the drawings together on a videotape called a pencil test to determine any mistakes in their animation.
It is a rough version of the final animated scene; in some instances, they’ll even add dialogue to verify if the lip-sync is perfect.
Step 7: Background
The backgrounds are the locations where each animated sequence’s action takes place. They can be done by computer or hand, just like the preceding stage. Traditional painted drawings are often created with gouache or acrylic paint, while watercolor and oil paint is sometimes used in animation. Line drawings outline the various backgrounds before painting them with colors displayed on the screen in backdrop layouts.
Backgrounds are vital in defining the scene’s general mood. An intelligent designer will know how to create backgrounds that correspond to the many settings and actions throughout the animation. They mostly serve as a guideline for painters to work on colorizing the backgrounds, and depending on the animation style, these lines may or may not be apparent in the final output.
Step 8: Inking and coloring
After all of the sequences have been animated, they are sent to the inking department. This is where the pencil sketches are transferred to celluloid. Celluloid is a translucent plastic sheet that is thin and clear.
Whether they’re creating it conventionally or digitally, they ink or photocopy the drawing’s outline onto a cell. Instead of being converted to cells, the animators’ drawings are scanned into a computer or straightened onto a computer monitor.
They are colored and processed using one or more software packages. The resulting drawings are composited in the computer over their various backgrounds, which have also been scanned into the computer (if not digitally painted). The computer produces the final film either as a digital video file or by printing to film using a high-resolution output device.
Step 9: Visual effects and Compositing
When a scene necessitates some form of 2d animation that would be difficult to achieve by hand, we employ computer effects. They can be used for a variety of purposes. When animators need to create a scene with a large crowd, a magical effect, or fire on them, they employ the computer.
We can save time and effort by using a computer to animate the background characters. Animators use computers to change the camera’s viewpoint, rectify any flaws, adjust the lighting, speed of movement, and ambiance of scenes; among other things, the compositor imports the colored background, animatic reference, and sound as needed.
The compositor assembles all of these parts and creates the camera moves and other necessary motions using the exposure sheet, animatic, and setting up 2d animations. Compositing is the technique of combining visual components from several sources into a single image, typically to create the illusion that they are all part of the same scene.
Step 10: Sound Effects
The sound effects are composed or designed by several orchestral, instrumental, or choral compositions, which are known as cues that are timed to begin and end at specific periods during the film or setting up 2d animations which will enhance the dramatic as well as the narrative and emotional impact of the scene.
Now in the last stage, here to produce the textures and layers of sound that enrich the tale, sound designers compose and record sound effects and atmosphere (footsteps, garments rustling, doors opening, etc.). They are now made digitally, but before the animation, sound designers had to make all of their noises. They recorded the noises of broken dishes, animals, door knocking, and other sounds in Snow White because there was no other way to do it. After then, the music for the backdrop is composed.
The mood of the main character is reflected in the background music. As a result, the music will be rapid or slow-paced depending on the setting. Artificially generated or augmented sounds and sound processes are used to emphasize artistic or other content in films, television shows, live performances, animation, video games, music, or other media.
Post-production
In the post-production process, editing is selecting segments of the 2d animation production video, sound effects, and sound recordings that will be included in the final output. The previously recorded dialogues are inserted and timed to match the character’s lip movements.
They use tracks to add audio levels, equalization, perspective, and treatments, which are then blended into the film’s final cut.