Animation is the place where you can show your utmost creativity. Successful animations are not produced overnight. A lot of things combine to make a proper animation.
Therefore, an animator needs to understand the basics of animation.
In this article, we will be discussing some of the Trips and Tricks that can take you from a beginner to an expert animator.

Visually Highlight the Most Important Elements
The goal of staging is to draw the audience’s attention to the most significant aspects of a scene. Add minor motions or other visual elements to draw the viewer’s eye if you’re having trouble deciding what to concentrate on in your animation.
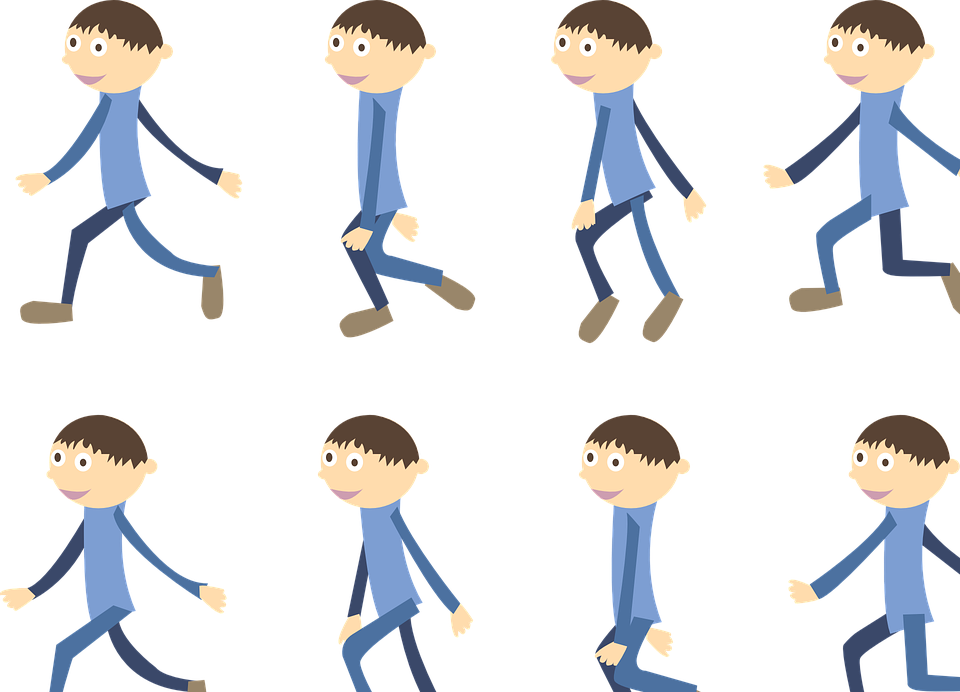
There are two methods for creating frame-by-frame: straight ahead, which you start at the beginning and work your way to the conclusion, and pose to pose, where you create the start and finish of your animation and then work your way to the middle.
It would help if you practiced selecting the best option for the animation you’re working on. Straight ahead is “great for the organic movement, such as smoke and flames, since it makes your graphics more dynamic and random,” according to several teachers and animators, including the well-known Johannes Fast.
whereas pose to pose is “great for motion capture where you had to hit different key postures throughout the picture.”
Be Sure Your Drawings Look Realistic
Among the most crucial 2D animation ideas is to use solid drawings. It reminds people that, even though objects are only represented in 2 dimensions, they must appear to be in three dimensions. Improve your 3D artistic abilities, and make sure all the components in your animation have realistic volume, weight, and balance.
If you’re having problems finding out how to create your animation to appear perfect, think about how it might happen in real life. This can be accomplished by watching various online videos, filming yourself acting, or observing how other people, creatures, or objects move.
It’s easy to get caught up in the technical parts of animation when you’re just starting; that is why the last principle is here: to encourage you to make your work engaging for the viewer by including beauty, variety, and even some fun.
Exaggerate Your Movement
Although many animations are about creating plausible movement, exaggeration is frequently what makes an excellent animation fantastic. The viewer may ignore movements that are too delicate, so consider pushing the animations outside the limitations of real movement, mainly because you want to emphasize something or add a significant impact.
Take motivation from the other animators and analyze how they have worked.
Bonus Tip: On online videos also, you can slow down the playback speed or pause the movie and then hit the period key to advance frame by frame. Take it a step further by attempting to imitate the work of other animators. While it’s evident that you shouldn’t pass it off as your original effort, it can be a valuable technique to hone your talents.
Use of Secondary Action
Any movements that aren’t vital to the scene but help complement the main motion and offer an extra dimension to the scene are referred to as secondary actions. Try adding some supplementary action to your animations if they feel a little flat. Pay particular attention to the animation’s concept of time if you’re wondering how and where to animate smoothly.
The number of frames your activity takes and how close those frames are arranged together are also factors in timing. You may change the animation’s apparent speed, weight, and cleanliness by changing the number of frames. To make the animation feel more fascinating and lifelike, you should use a variety of timing.
Ease In and Out of Your Movement
When an item moves, it doesn’t always start moving at the quickest pace or stay at the same pace the entire time; however, a lot of awful animation does.
As a result, you should ensure that all of your motion has a realistic acceleration and deceleration, as per the animation concept of slow in and slow out. You may apply this with your pictures by including more pixels at the beginning, fewer in the center, and at the finish of a movement.
Almost nothing in nature goes in a straight line—waving your hand or swinging your arm will reveal an arc, even if it’s small. If your animations appear a little weird, consider using some arcs to smooth the route of the movement.
All Movement Has to Follow Through
Anticipation is about how you begin your movement, whereas execution is more about how you finish it. When an object comes to a complete stop, it usually doesn’t do so all at once. Introducing minor movements after the significant focus has ended will give it a more realistic appearance.
It’s rare for an object to start going forward without some form of preceding movement in the opposing direction. Consider tossing a ball: Before extending your arm forward, you pull it back. The illusion of elasticity and liveliness can be created by squashing and extending a material as it moves.
It can also notify the viewer about the object’s hardness or softness (softer objects should squash and stretch more). If your animations appear overly rigid, consider adding compress and stretch to the animation to see if it helps. The addition of anticipation gives the spectator a sense of what’s to come and prevents your movement from seeming random.
Loosen up when animating
At the point of contact, avoid keying the entire body. The moment of contact will not be recorded on 24fps film in most activities, especially faster ones. More crucially, you’ll flatten your arcs by biasing the movement to culminate at the point of contact. The arm is the stronger force when a figure picks up a glass.
Animate the hand passing through the glass, keeping on lovely arcs while overshooting the contact point. Adjust the glass location and limit to compensate for the moment of touch missed between frames. You should also treat each phrase or line as a separate shot. Limit your timeline to show the sentence you’re focusing on, and give the idea you’re animating a beginning, middle, and end.
Mute your dialogue
When working on body movements and full-body motions, it’s tempting to rely too heavily on words to make up for lack of physical performance. With the sound muted, the best conversation shots work just as well. Before displaying your peers, mute your images to diagnose the communications in them.
Your body language also isn’t evolved or encouraging enough if your coworkers do not acquire a strong image of the connection between the figures and a decent understanding of what is being said. Return to your body and reaffirm your pose selections for the essential aspects.
Speaking the line entirely with your body language before unmuting the dialogue and ironing out the lip-sync. You can’t always get rid of flaws in animations, no matter how hard you try. Select all the settings and configuration keys directly following the initial hitch to bookend this section. Now delete the troublesome keys, safe in knowing that they will not influence the rest of the series.
Pre-Production
The first phase in the animation process is the pre-production stage. During this stage, the animation team develops the plot. It creates the animation screenplay, designing the characters, producing a storyboard, choosing colour palettes, prepping backdrops, and recording the voice-over. Because this is a step in the process’s preparation, it must be executed appropriately. A well-written script should include all visual actions and narratives.
Based on the narrative, the storyboard describes the chronology of events and activities by demonstrating how they are organized. Characters will be developed, backgrounds will be sketched, and other visual elements planned.
Production
Production is now bringing the animation concepts together, which we accomplished by collecting all of the previously created elements and assembling the scenes. This method includes painting backdrops, creating particular scenes and character activities, preliminary animation, straightening up the animation (tracing), inbetweening, colouring, and painting the drawings using computer software, compositing, and exporting.
Animators create an exposure sheet with all of the stages for making each scene tie everything together. There are five components to the exposure sheet: timing and motions, music, and conversations. The background, animation layers, and the point of view are all included. It is necessary to clean up and polish a crude 2D animation once it has been created. This process is also known as tracing.
That was all about the Animation Tips & Tricks for beginners.
If you want to know more exciting animation facts, visit our website.